Goldbug Software
Merge Print
 Merge Print
![]()
Merge Print for Mac | ¥480
macOS 10.13 and later
What's New
Apr 10, 2024 Merge Print 1.0.0 is released.
- Merge Print is an app for merge printing.
Merge Print
Merge Print is a Mac app that allows you to print in merge.
"Print in merge" is a function that allows you to print data such as names, addresses, postal codes, etc. created in Numbers or Excel all at once as business card, labels or postcards in a designed layout.
Merge Print allows you to enter data directly through a table-style interface. And you can design the layout on the preview and check the print result.
This application does not communicate with any outside parties. The data you input is only used within the app, which is not sent to any outside parties.
Functions
- Import CSV file
- Edit printing data on table style
- Adjust print position on preview
- Vertial Text
- Find and Replace
Import CSV file
Data for merge printing can be read from a CSV file. Select the CSV file from the file selection panel that appears when you select "Import from CSV" menu in the File menu.
A CSV file stands for Commma Separated Values file and refers to a text file with items separated by commas. You can export Excel and Numbers data to CSV files. Merge Print can read this CSV file and use it as mail merge data.
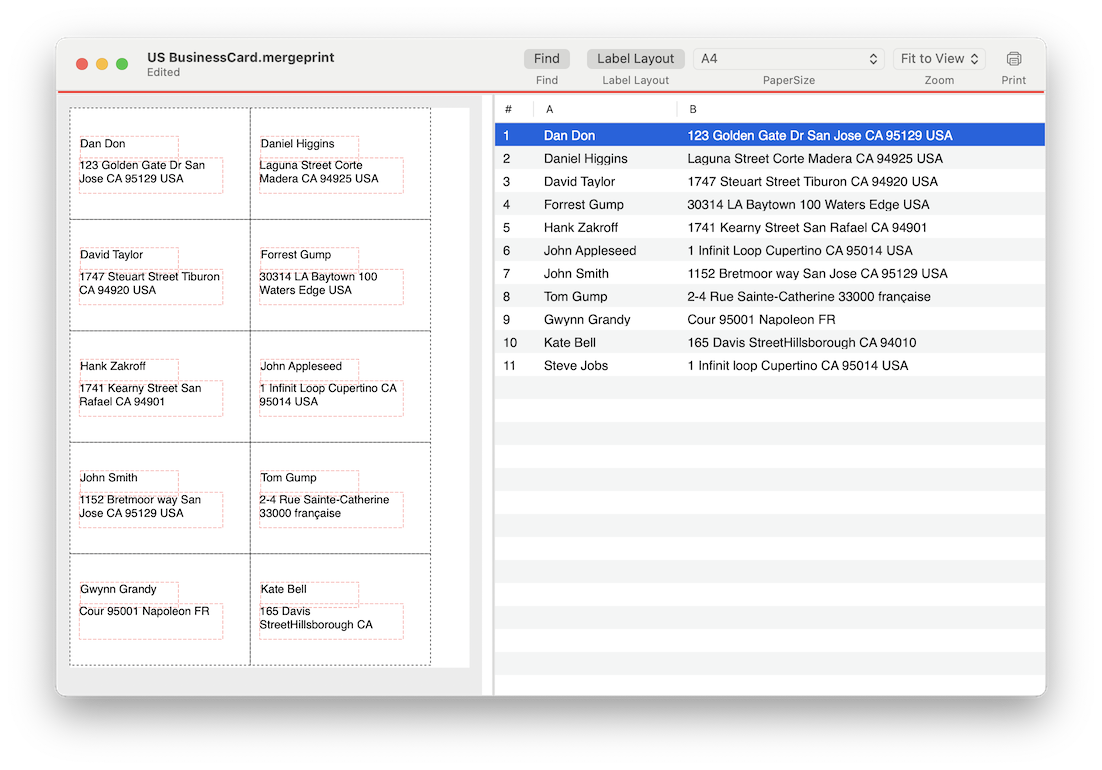
Edit printing date on table style UI
Merge Print can also create print data using a table style user interface without using CSV.
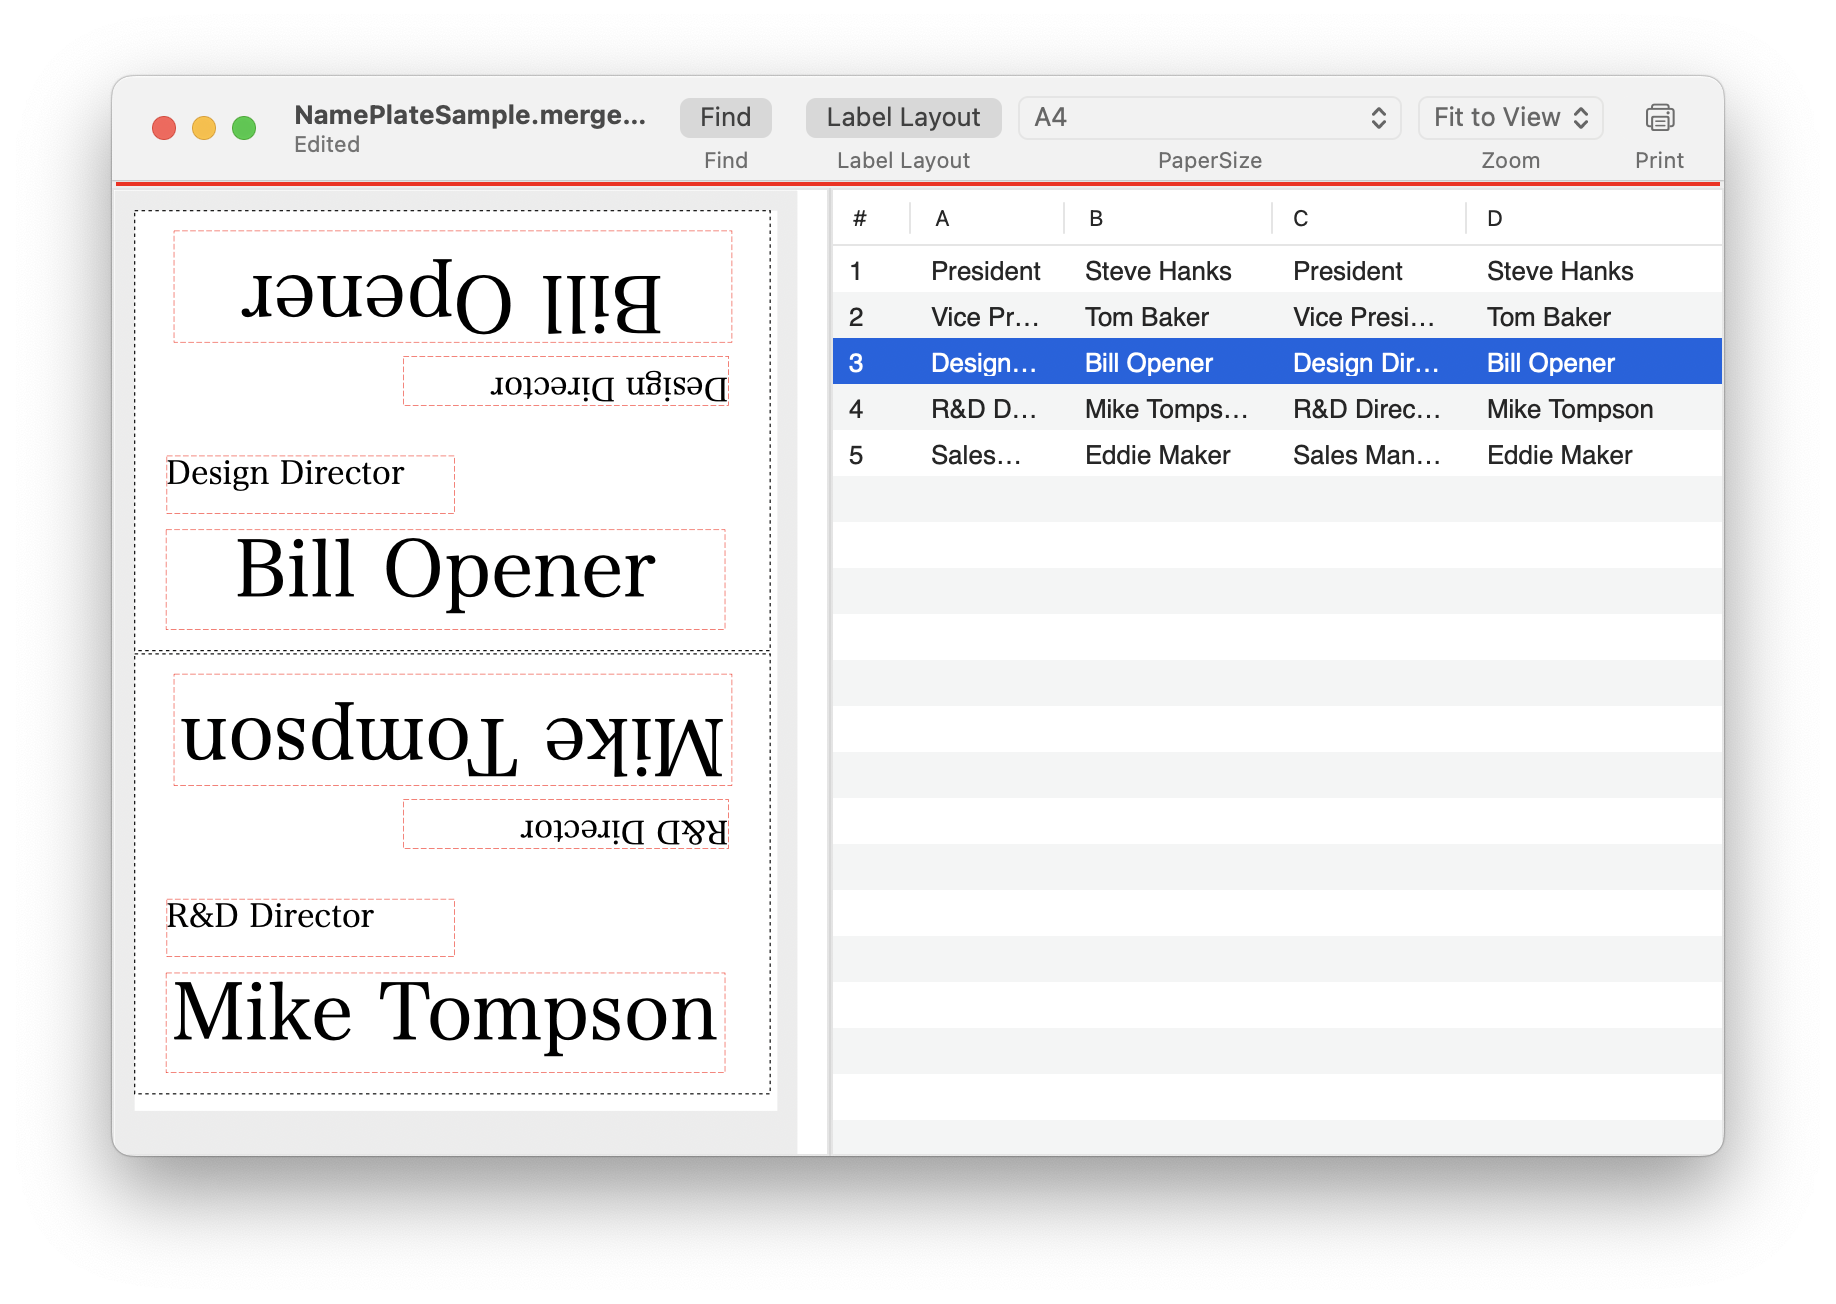
Print data consists of a rectangular area called a label and the strings contained within it. On a table, labels correspond to rows and strings correspond to columns.
The image below shows a new file opened. The preview shows two strings in two labels. The four cells in the table correspond to it.
|
|
Clicking a cell in the table allows you to change the string.
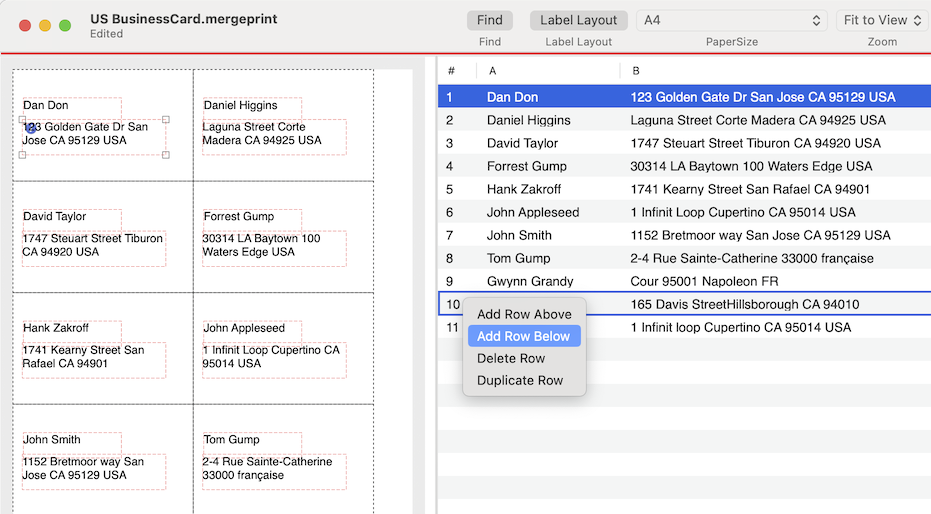
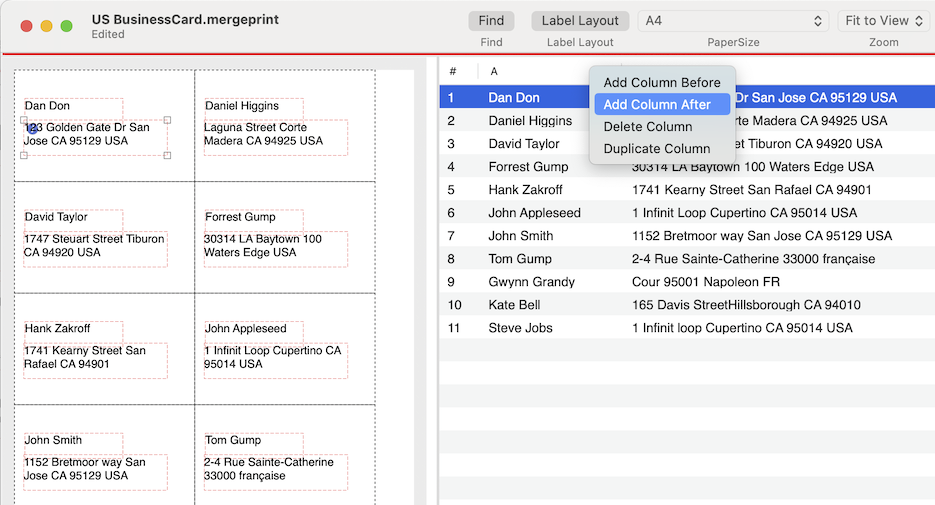
You can add or delete rows. Clicking the row in the table with holding down the Ctrl key, the context menu will be shown below. Similarly, you can add or delete columns by Control-clicking the table header. Also the "Navigate" menu in the main menu do the same thing.
|
|
Adjust print position on preview
When you click the red frame in the preview on the left side of the window, knobs will be displayed on all corners of the red frame. The knob indicates that the layout of the red frame can be moved or resized.
You can change the position or size of the red frame by picking the knob or edge with the mouse and dragging it.
Vertical Text
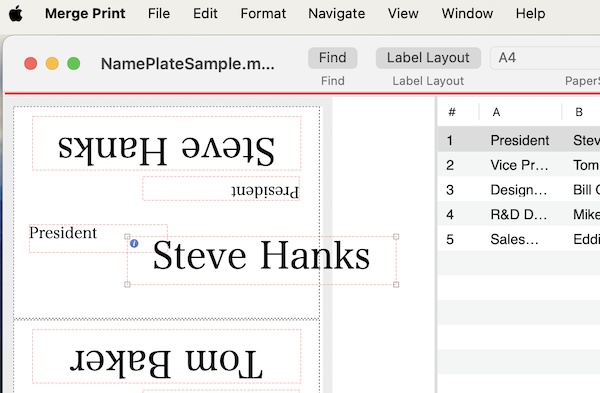
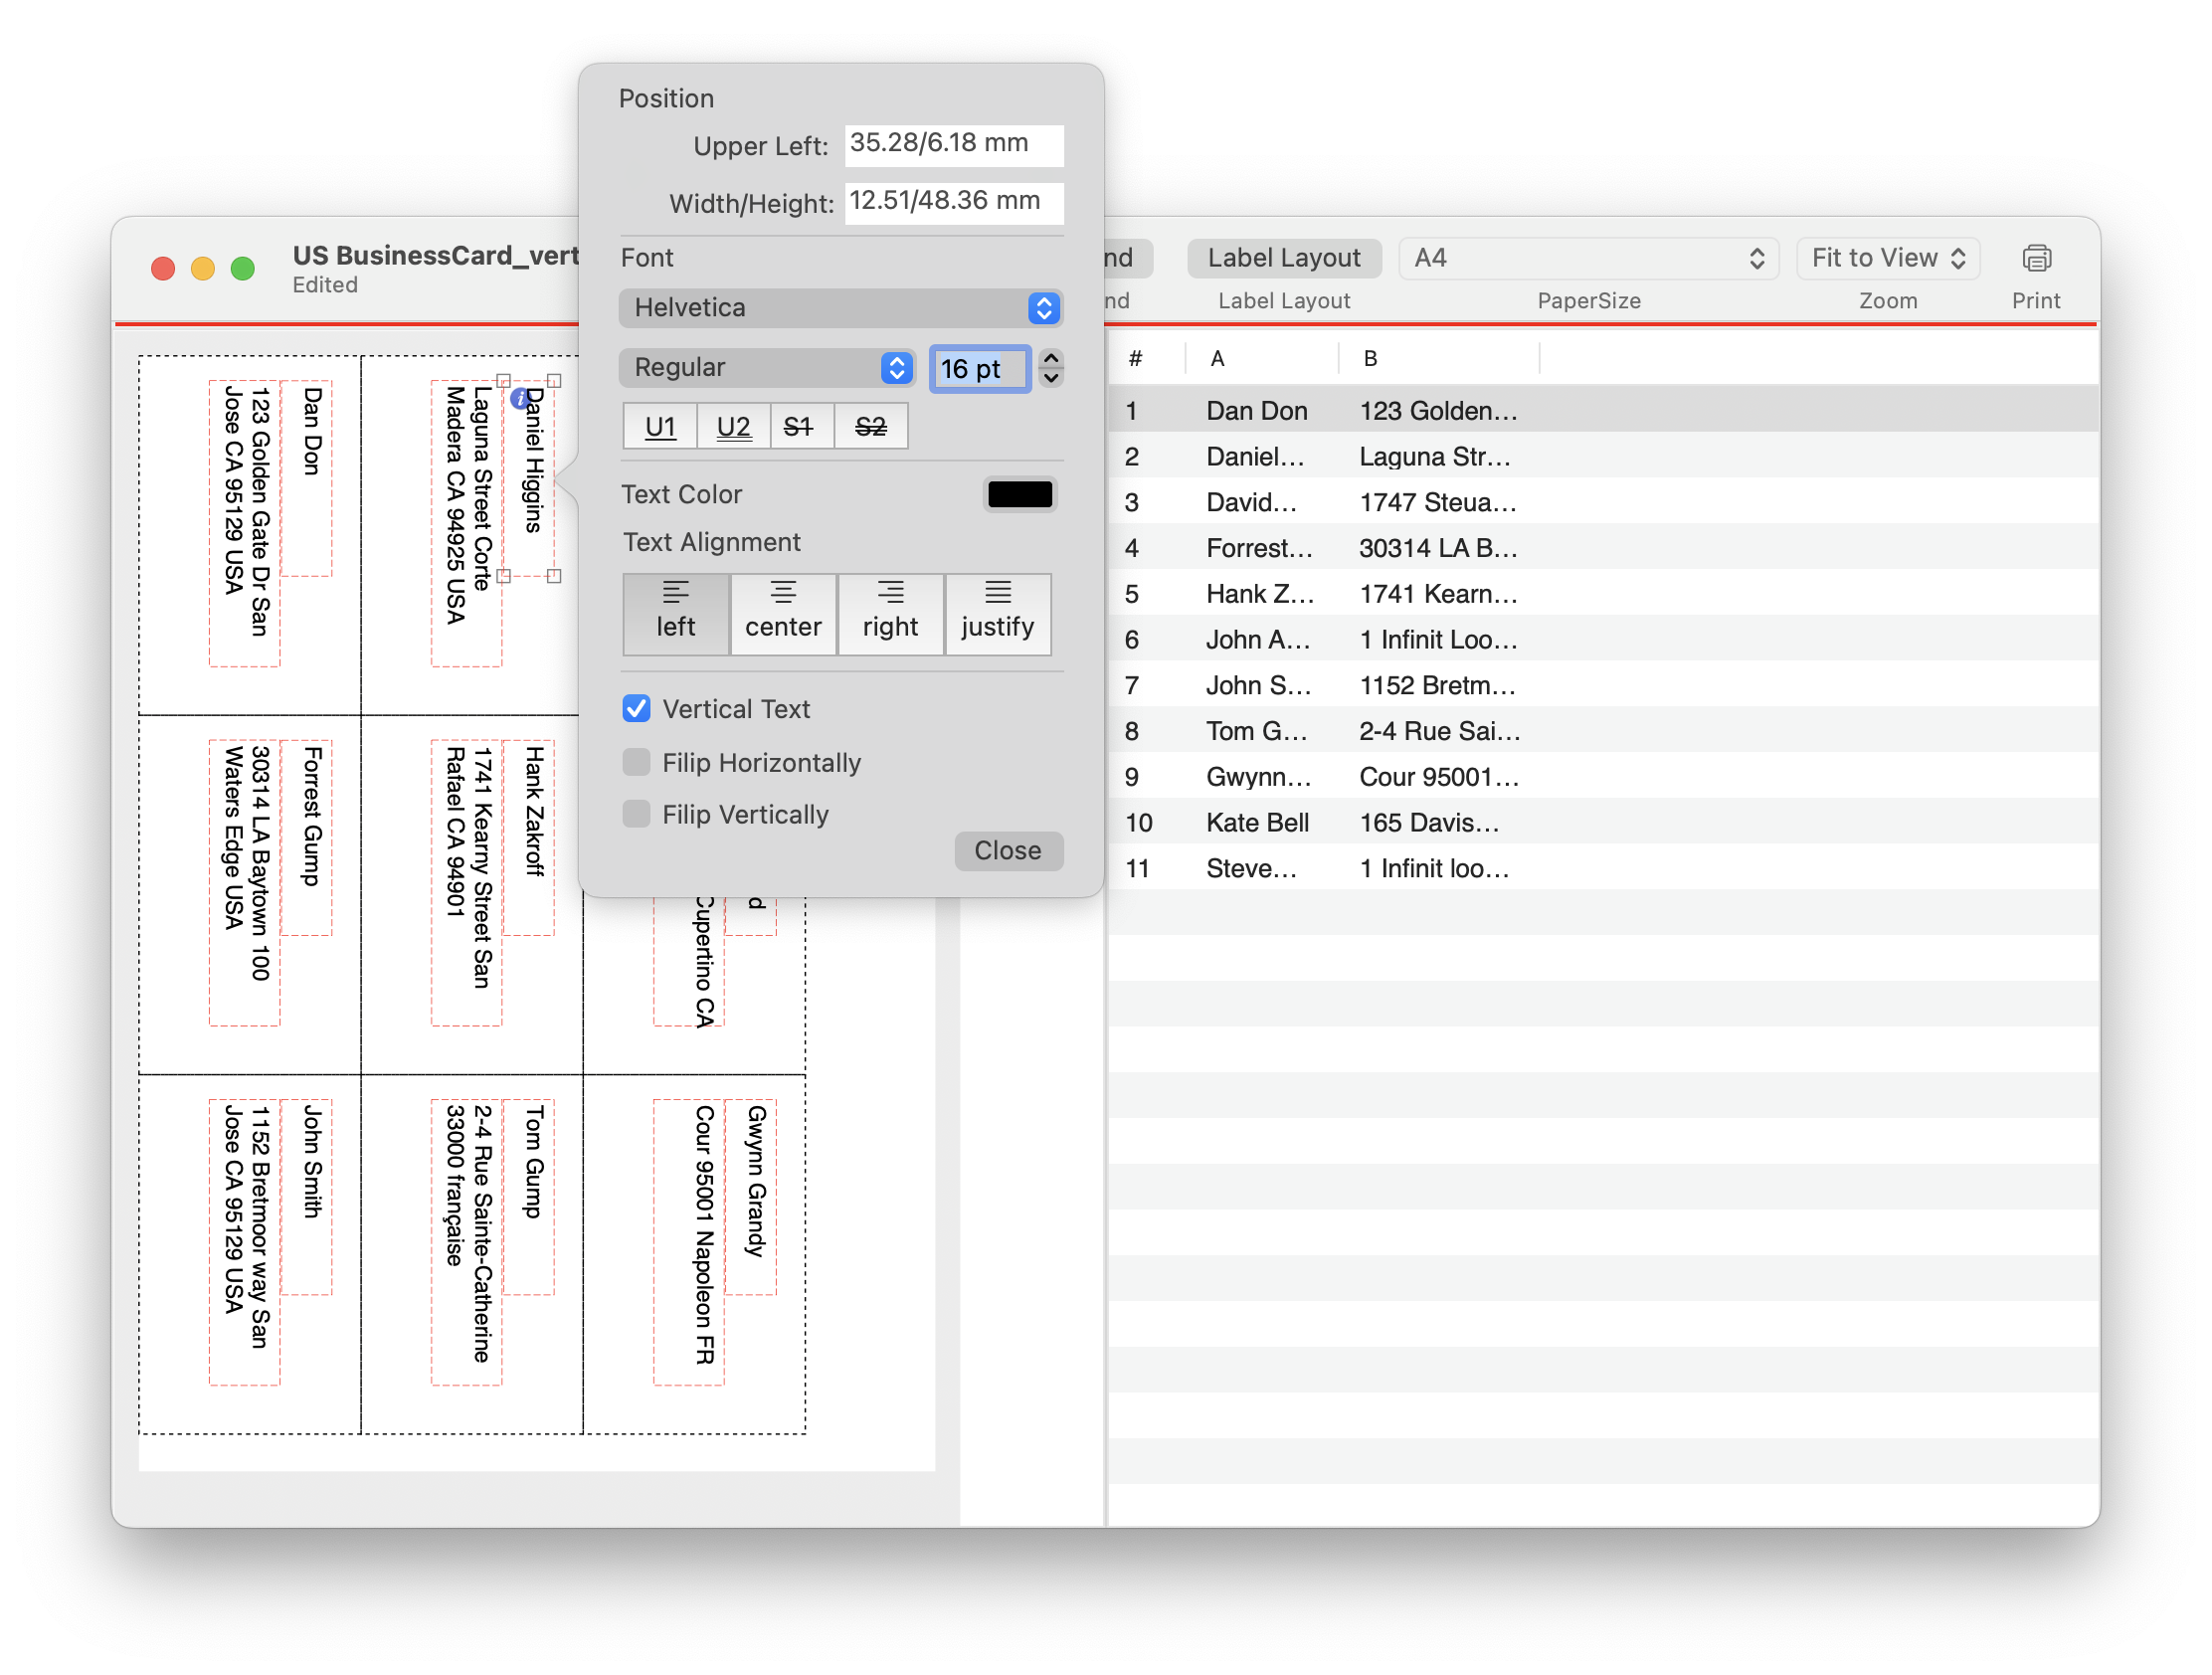
If you click the "i" mark that appears when you click the red frame in the preview, information about the string will be displayed, and you can change the font, size and style of the string.
Also you can change the text to the vertical text by clicking the "Vertical Text" checkbox at the bottom of the displayed information panel.
Find and Replace
Merge Print allows you to search and replace strings on a table.
Choose Find from the Edit menu or click the Find button in the window's title bar. The FindBar is shown below, when you type the string in the search field, the string will be highlighted in the table.
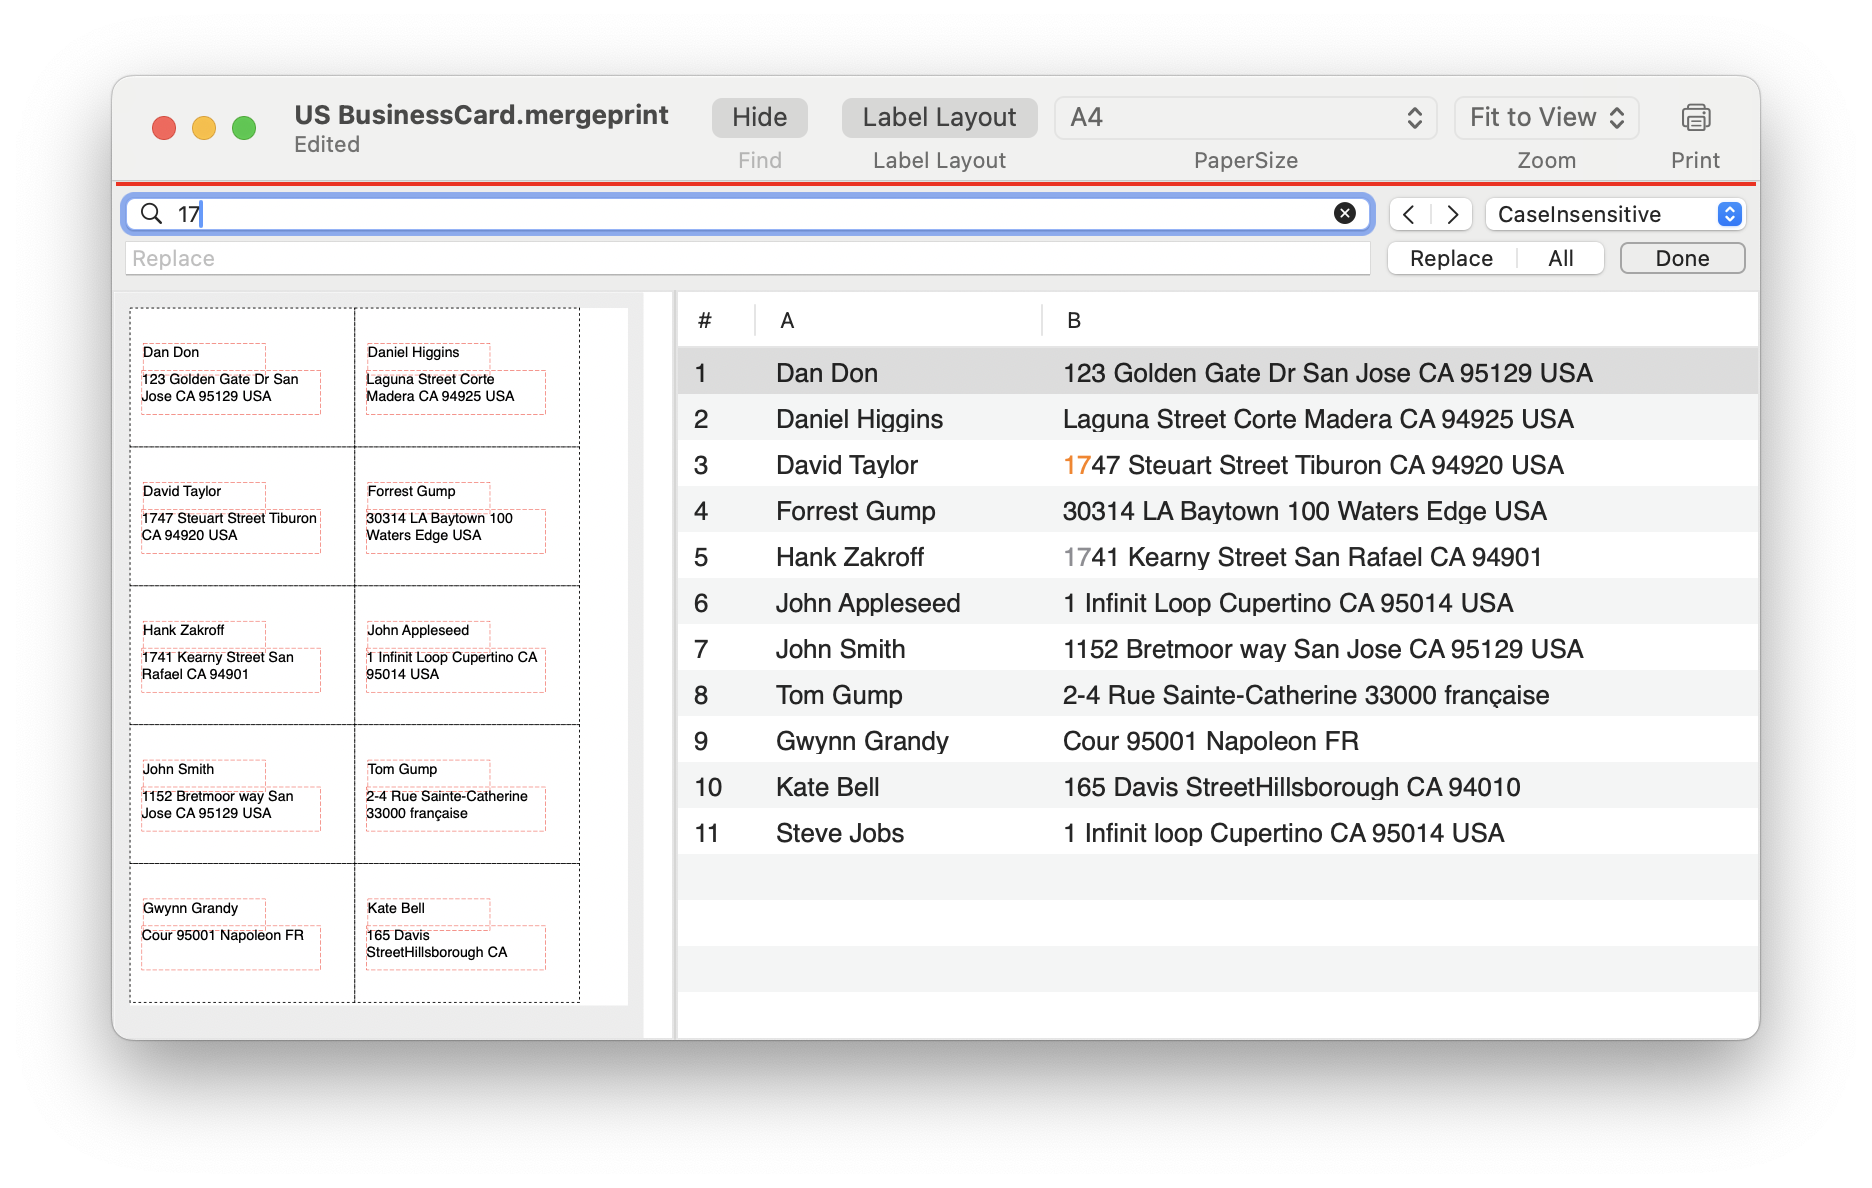
By clicking the "<" or ">" button in the FindBar, the hightlighted string will move in the table.
You can replace the highlighted part by clicking the "Replace" button with the string in the Replace field.
Printing
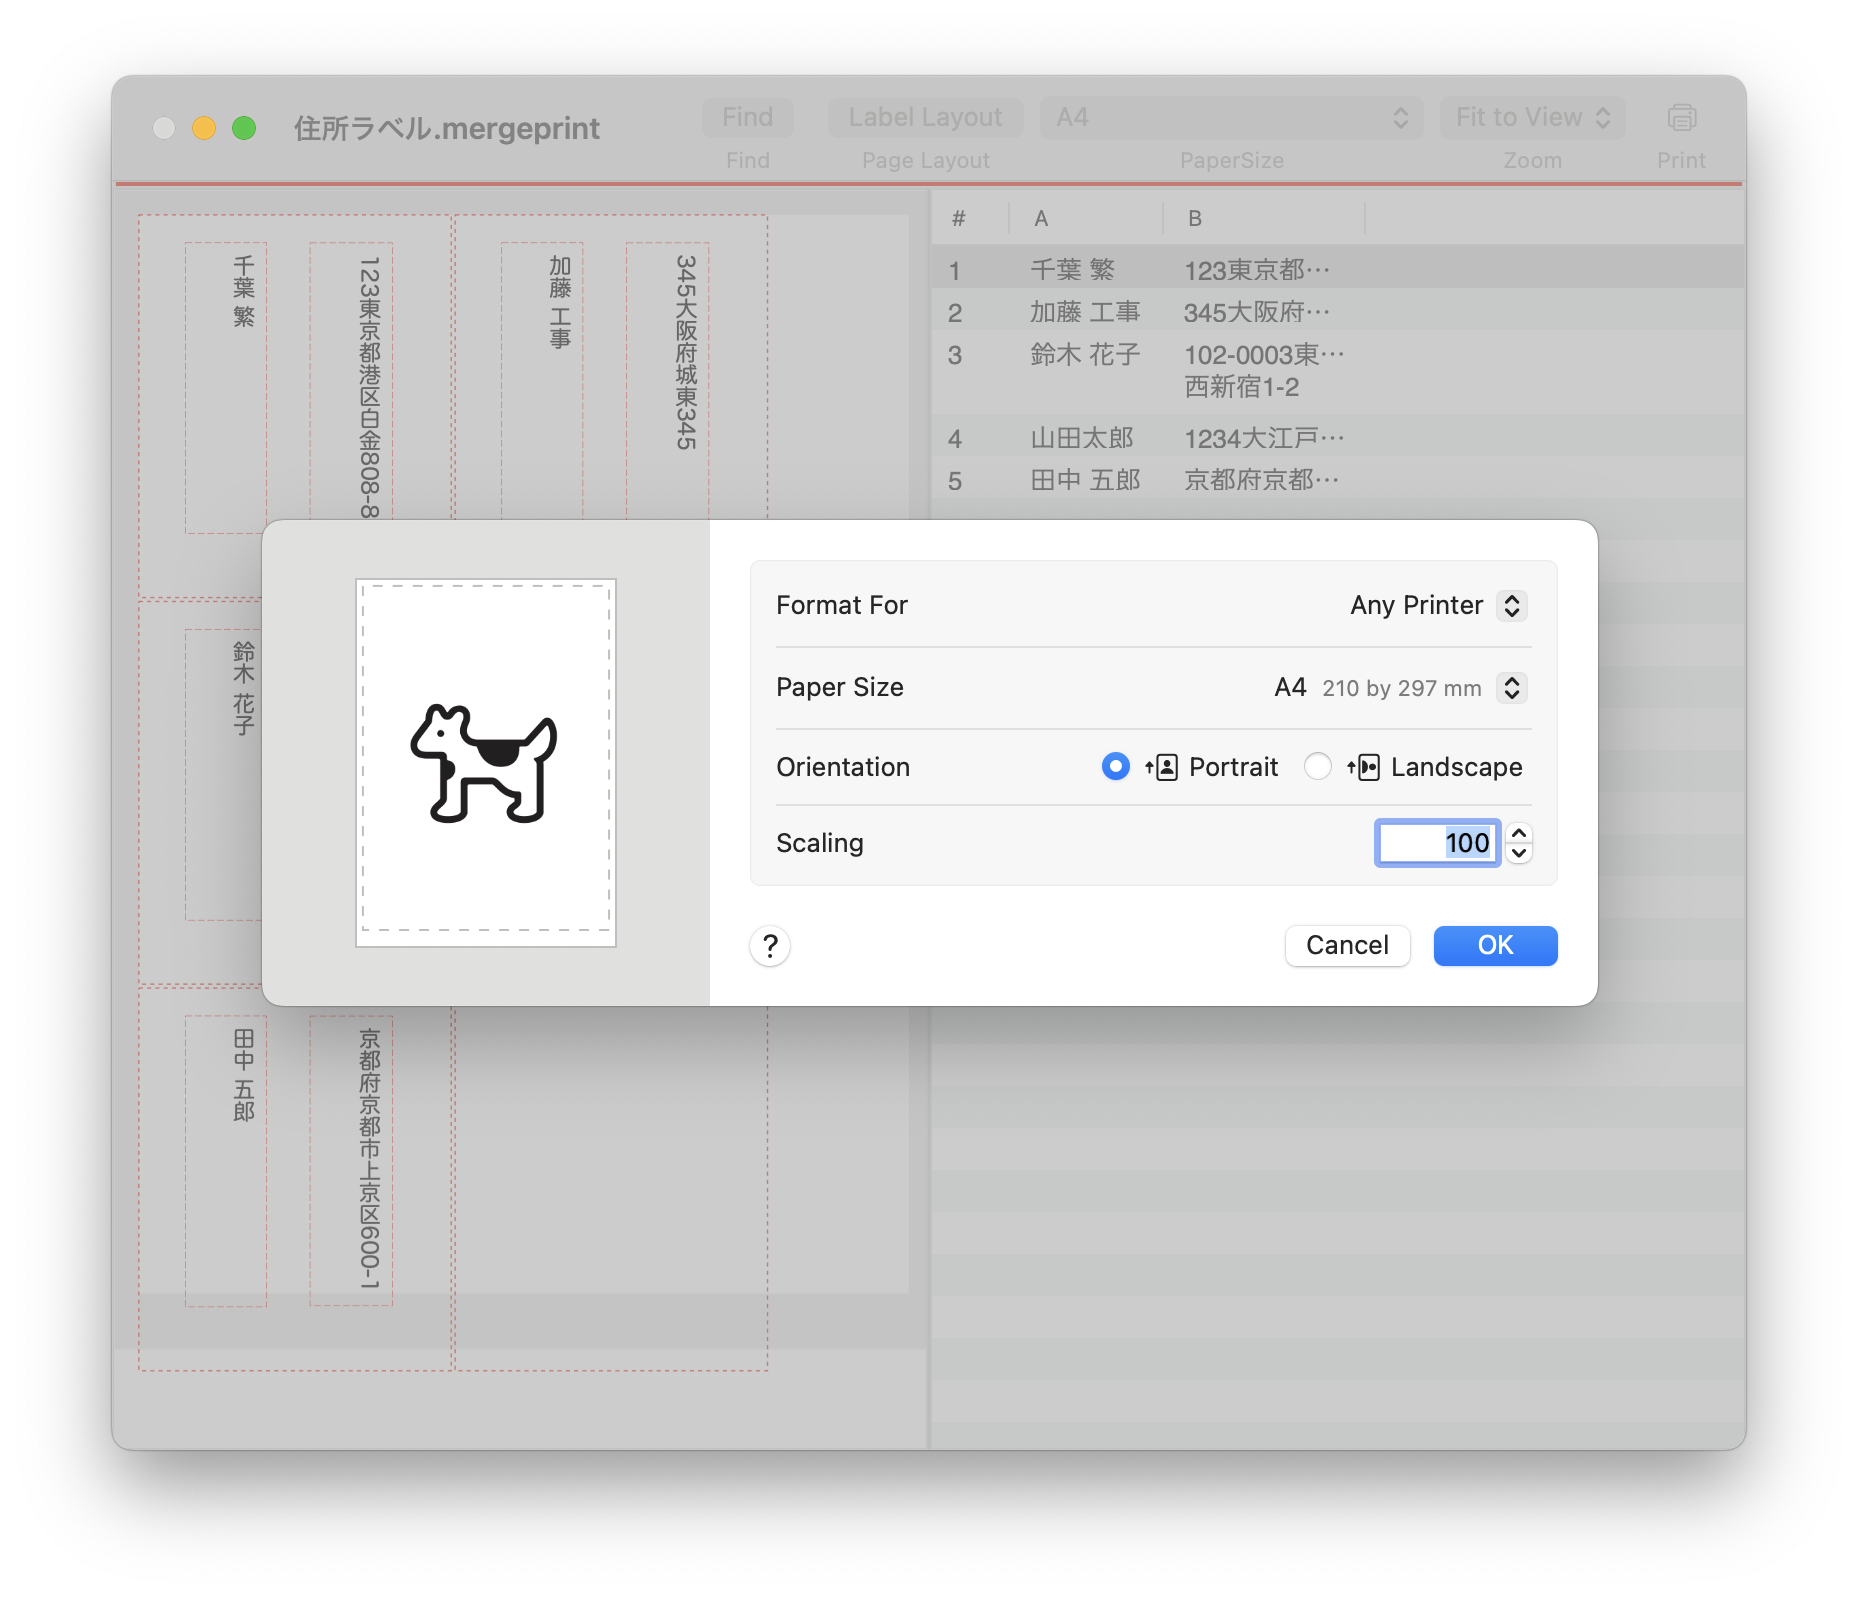
You can change the paper size from "Page Setup" in the file menu or from the Page Size menu in the window title bar.
To print on envelopes, select "Envelope" as the paper size. The image on the left side of the window will be changed to envelope size.
The red frame that indicates the border of the label is printed as a thin black line, and the red frame that indicates the position of the string is not printed.
Actual print sizes vary depending on the printer, so please select your printer and then select the paper size.
The gray area on the preview is the printer's print margin. Please note that the text in this area will not be printed.
If you select "borderless" paper, the image will be enlarged when printing, so plese note that the print position and size may not be the same as you specified.
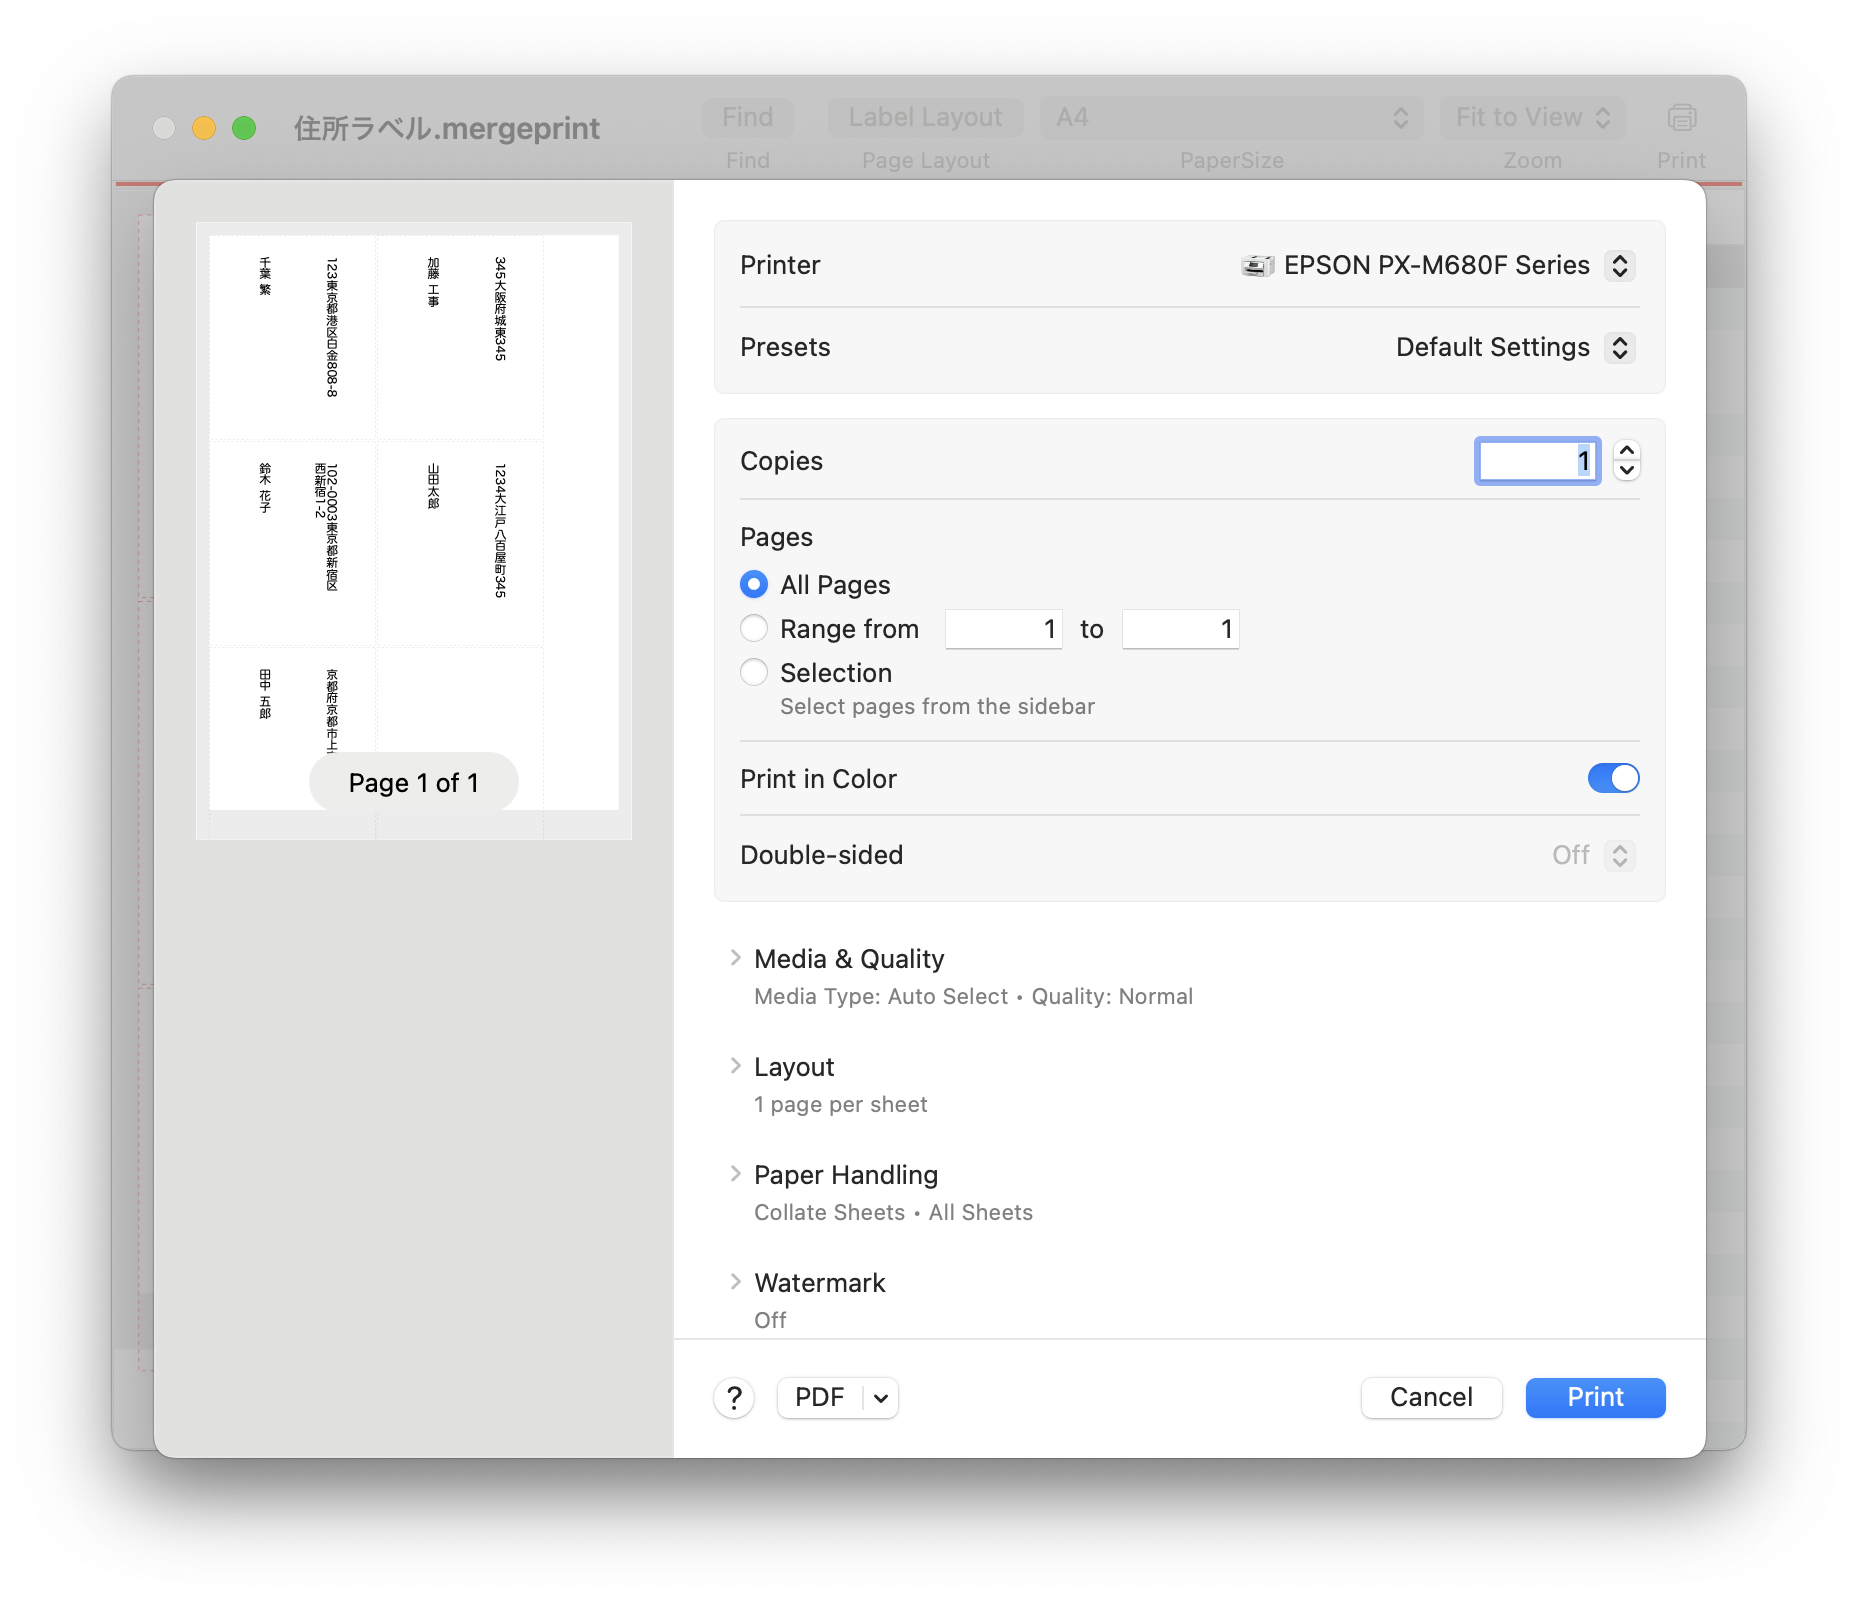
And you can preview the print image in the print dialog that is displayed by selecting "Print" in the file menu.
Operating evironment
Merge Print requires macOS 10.13 or later.
How to install the trial version:
Click the ZIP file which is downloaded from our web site, it is unziped to Merge Print Trial.app. Please launch this app and try it out.
Uninstall:
You can uninstall by moving Merge Print Trial.app to the trash and deleting it.