Goldbug Software
Additional info of vCard Lite
How to use vCard Lite
Contact Info View
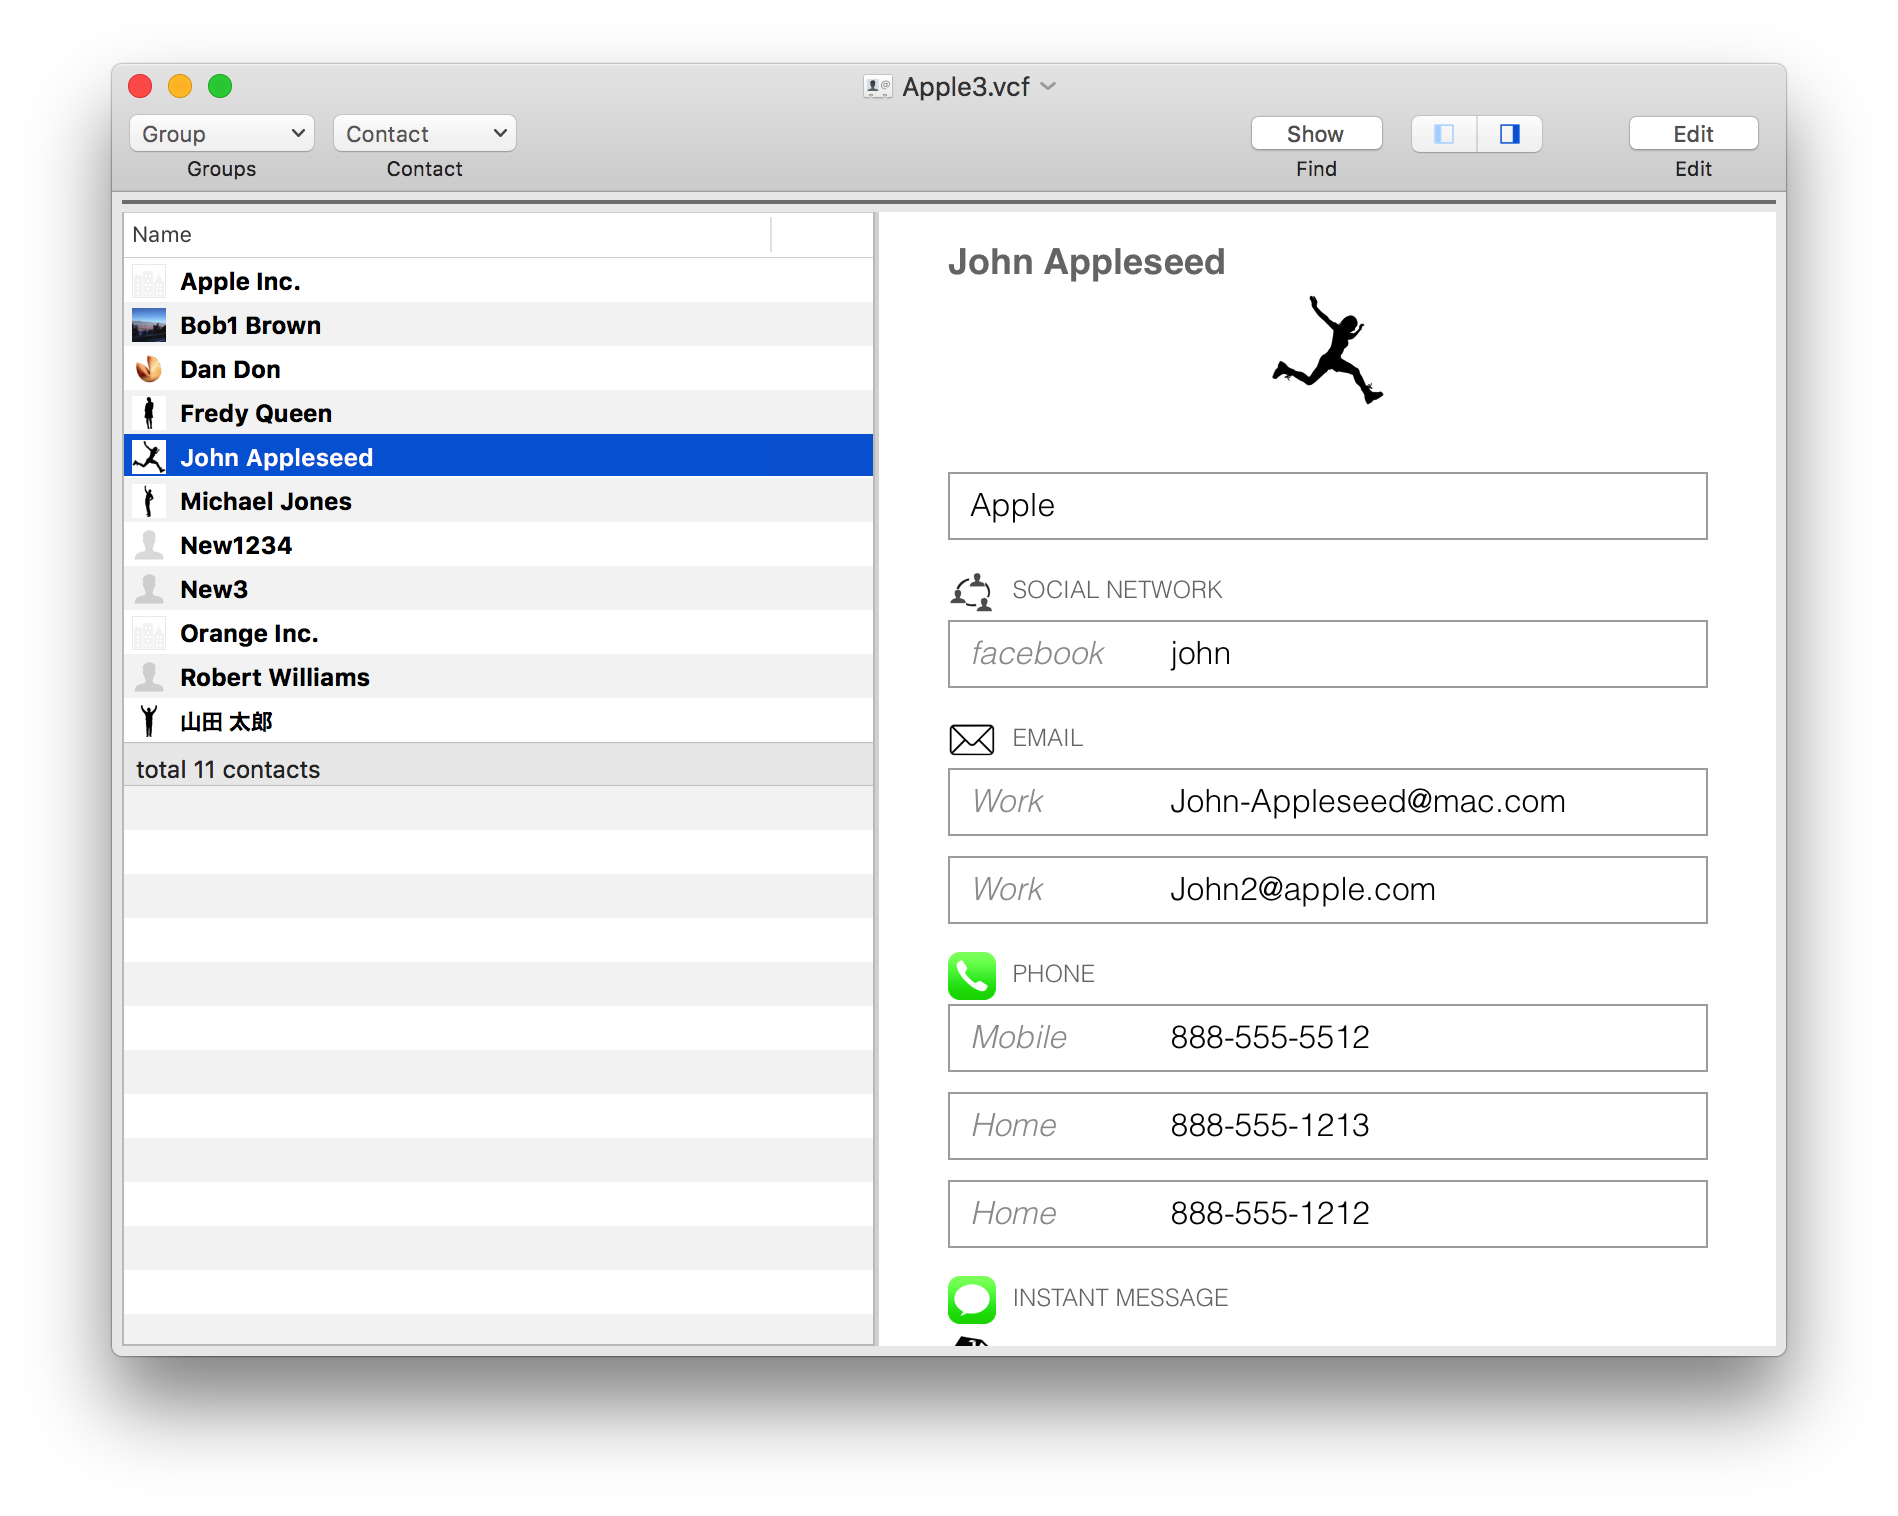
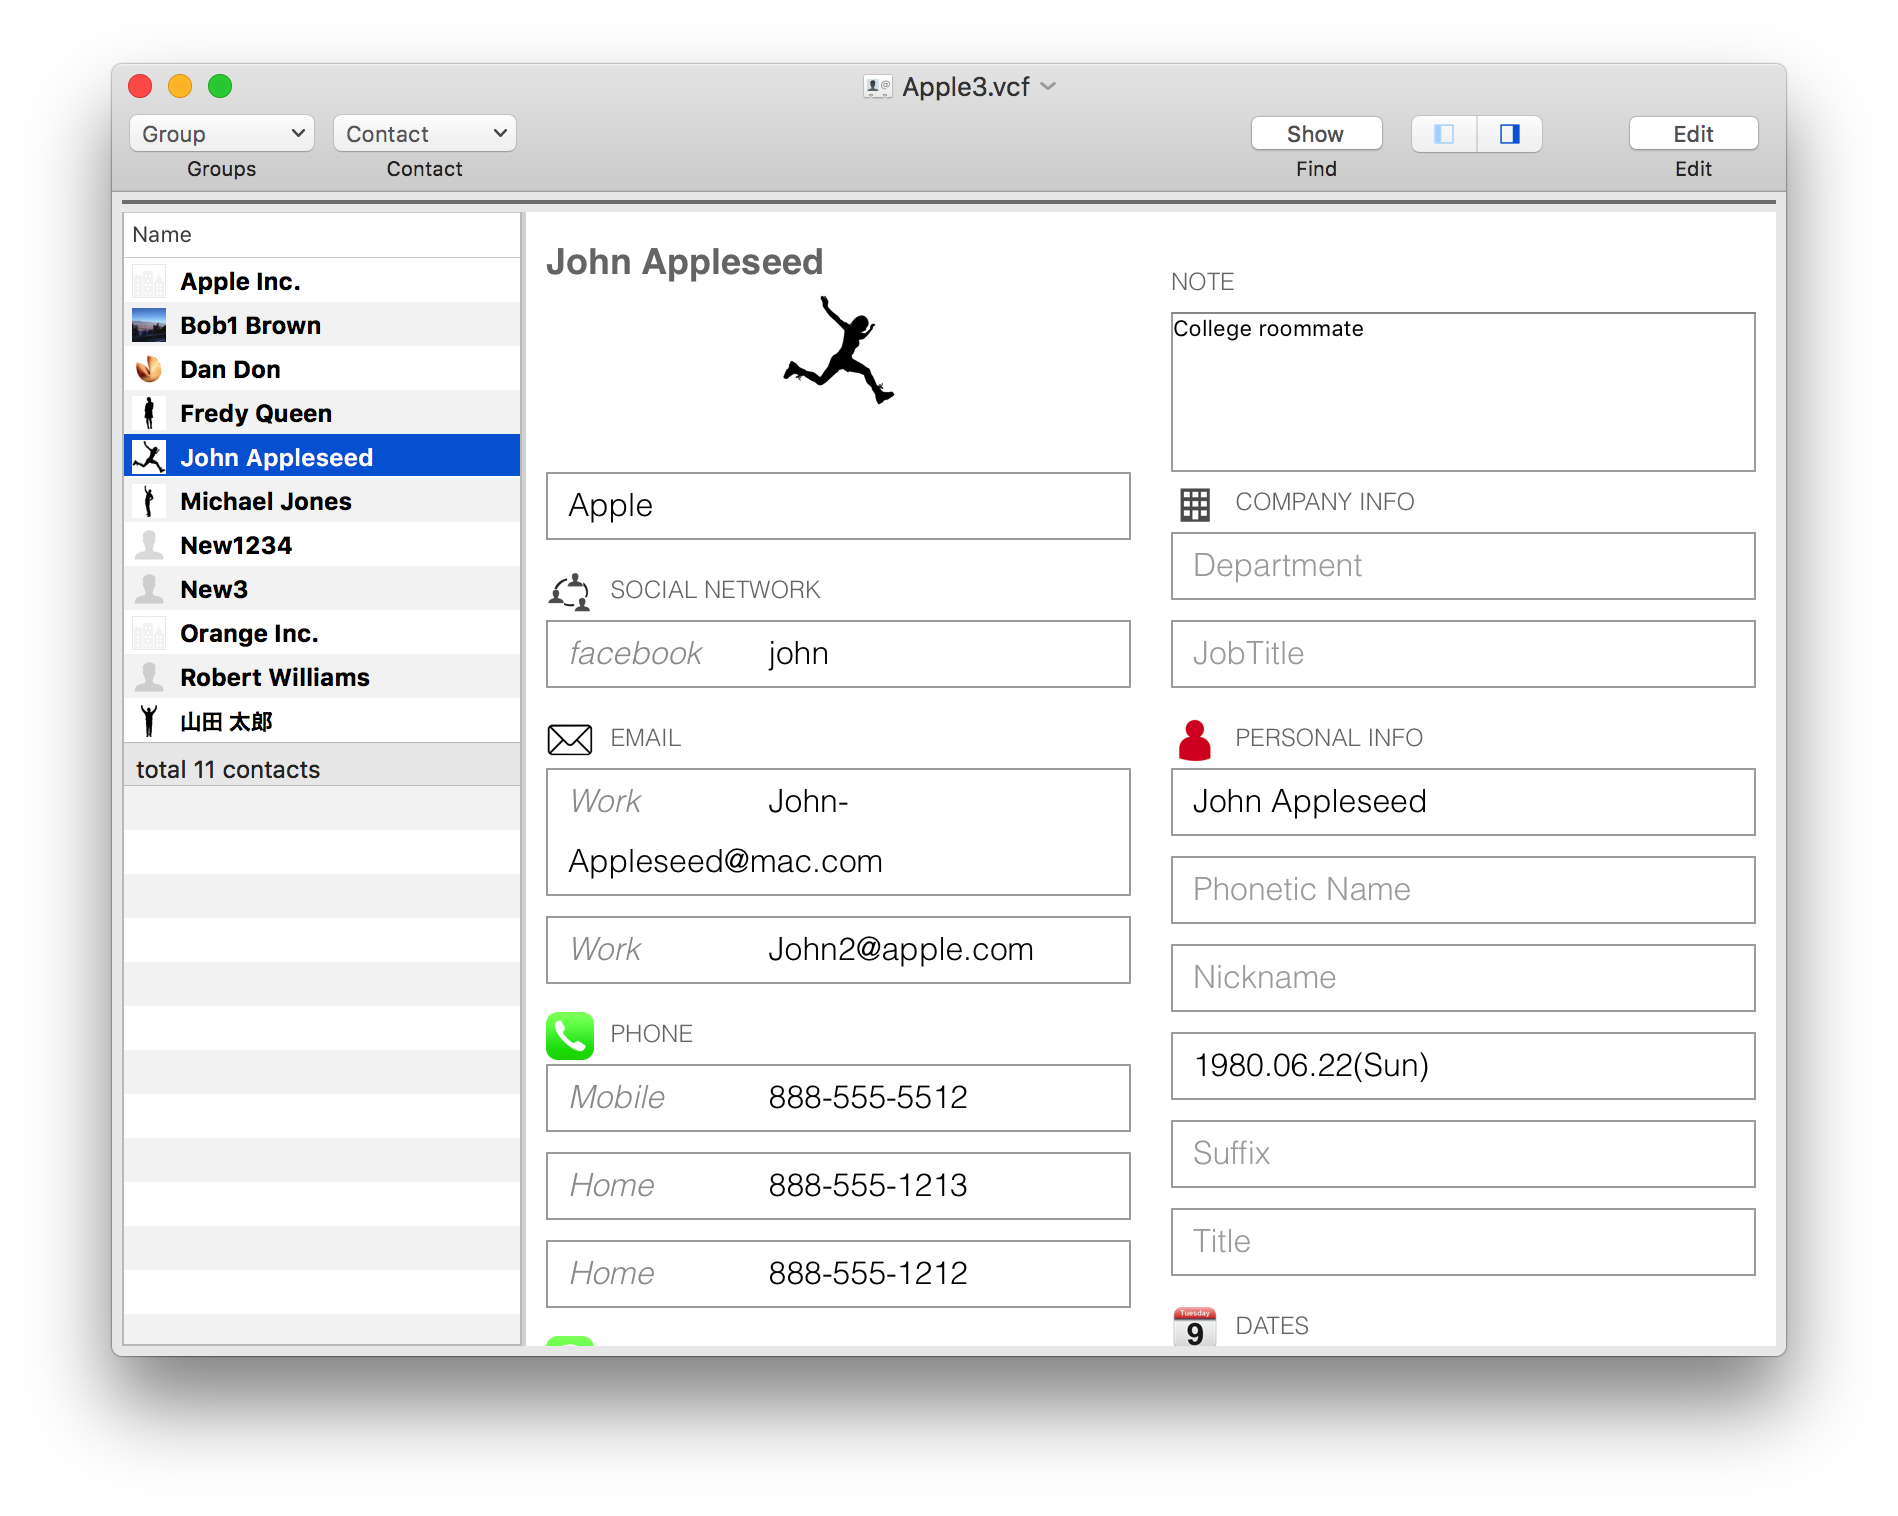
The contact info is shown at right of the window, when you click the side bar button in the toolbar or select the "Show Contact Info" menu in the contact menu of the Navigate menu.
The view is switched when you click the edit button.
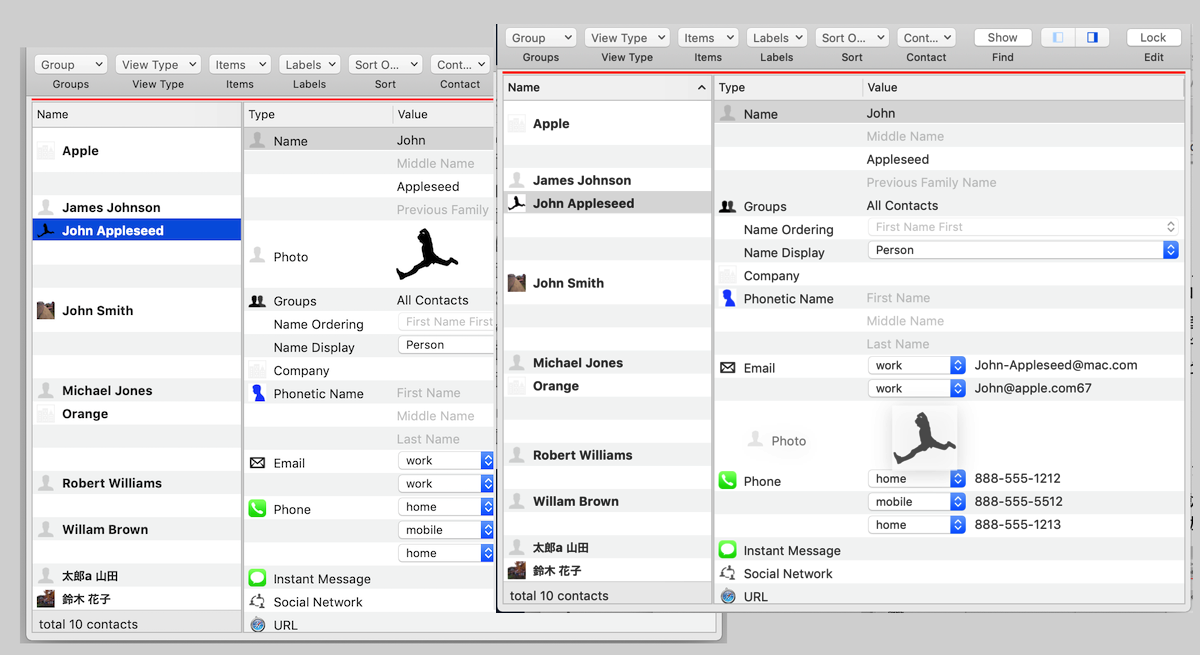
If the button is "Edit", the following table is shown and you can edit the values as same as before.
If the button is "Lock", following new table is shown to be more readable. And it is not editable.
The view turns to two columns according to the window width.
Editing Tips
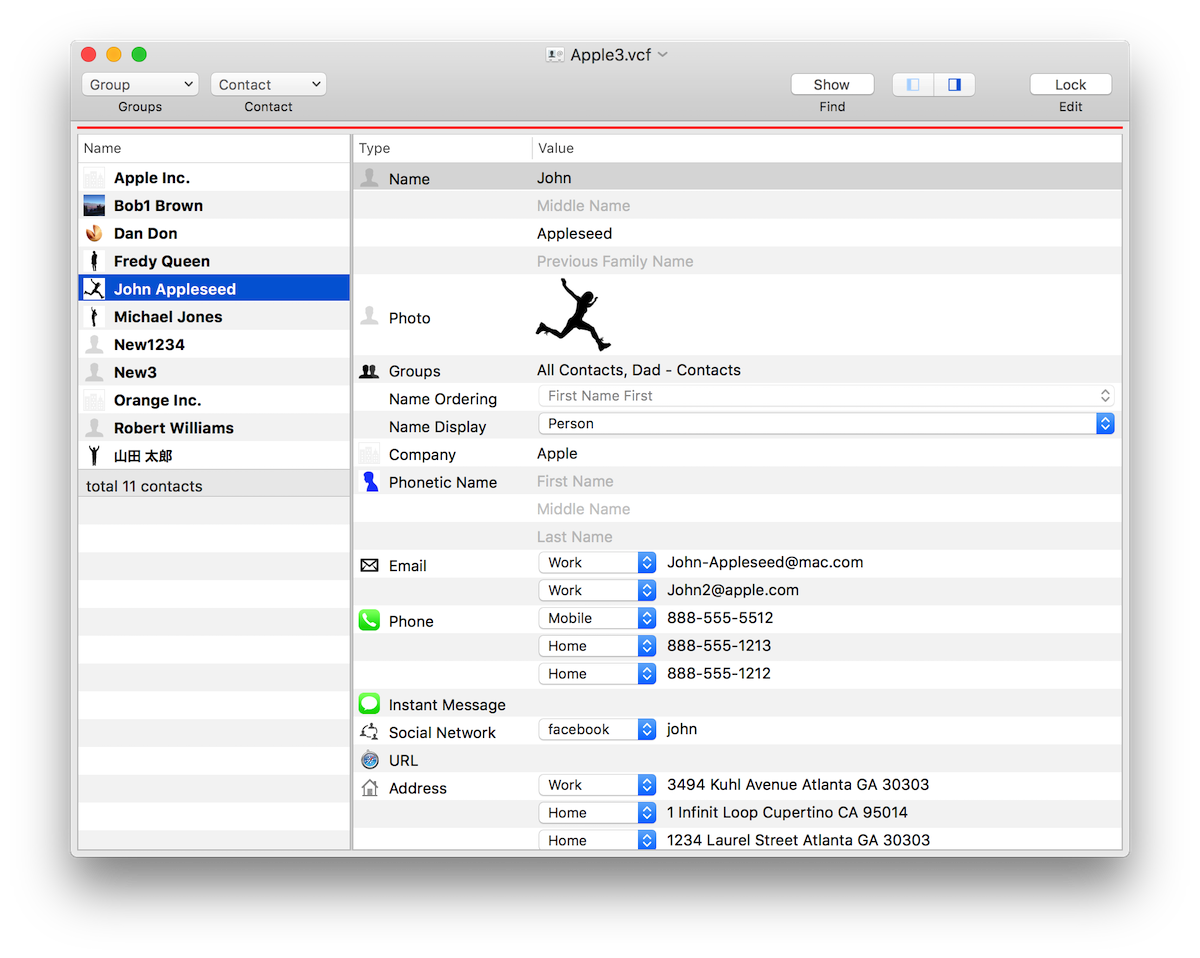
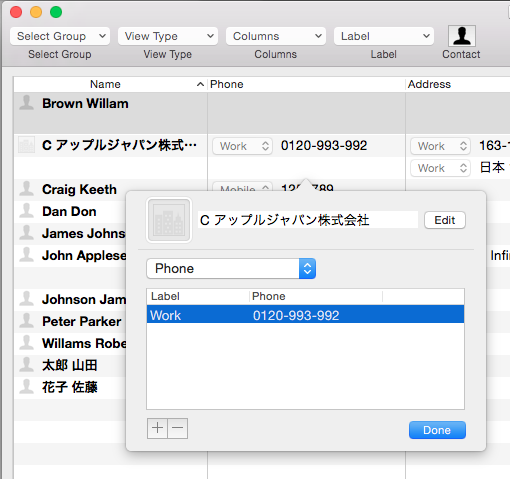
There are two types of data in the vCard file. One is just string such as company, and the other is labeled value. The labeled value consists of label and string and you can have multiple label and sting pairs.
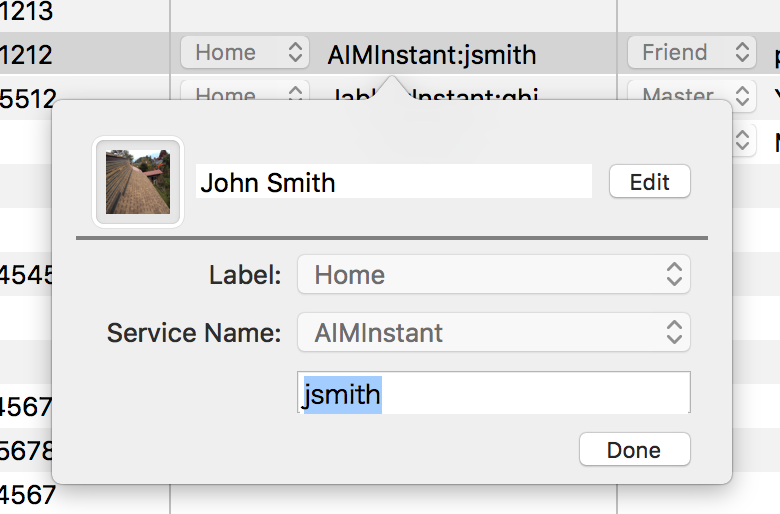
And if the data is the labeled value, you can add multiple values as the data like the picture below. So the panel is used to add/delete the labeled value.
In case of the address and instant message, those string consists of sub strings such as ZIP, State, Street, and so on.
The string in the cell can be edit directory which doesn't have label, or consists of sub strings.
When you type a enter key, selection will move to the next row.
If the next cell is empty or the cell is for labeld value, the edit panel will open.

Dobule-click with holding the command key on a cell which has a label, the edit panel will open.
The panel lists the labeld values, and show the buttons for adding/deleting the labeled value.
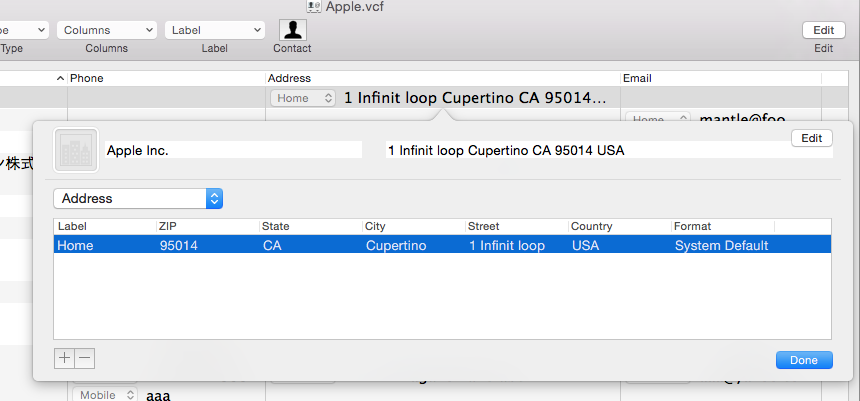
The other edit panel will open when you double-click the cell, if the cell is for address or instant message.
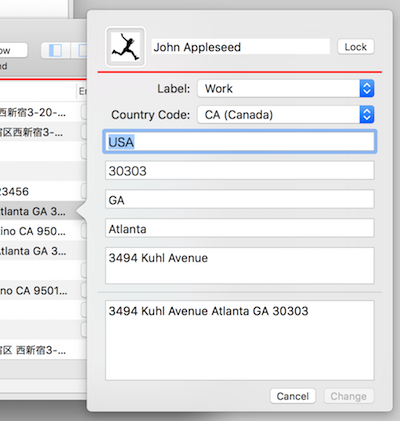
Country code in the address panel
When you double-click the address cell or with holding the command key, the following address panels are shown. The country code in the panel is used to change the format of the postal address. If it is empty, county code in the system default is used. Please note that the Country value is not related to the country code. You can set any string as the Country.
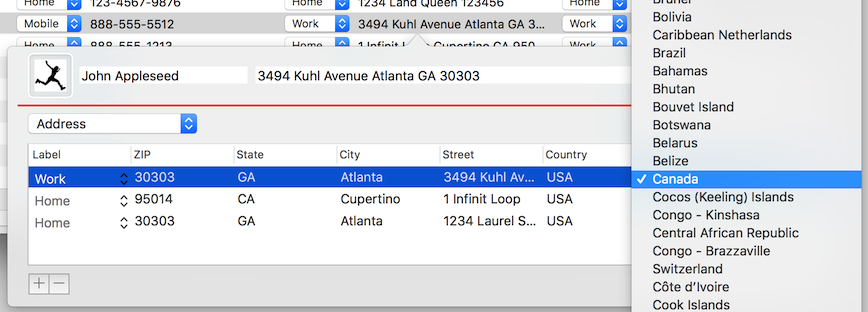
The country code is used to format a address.
When you select the country code in the column, the string at the top of the panel will be formatted as the code.
For example, when you select US at the column, the strings will order like "1 Infinite-loop Cupertine, CA 95014".
When you select JP, it will be "95014 CA Cupertinoe 1 Inifinite-loop".
Find&Replace
vCard Editor2 has a Find&Replace function.
The FindBar will be shown when you select the Find menu in the edit menu or click the find button in the Toolbar.
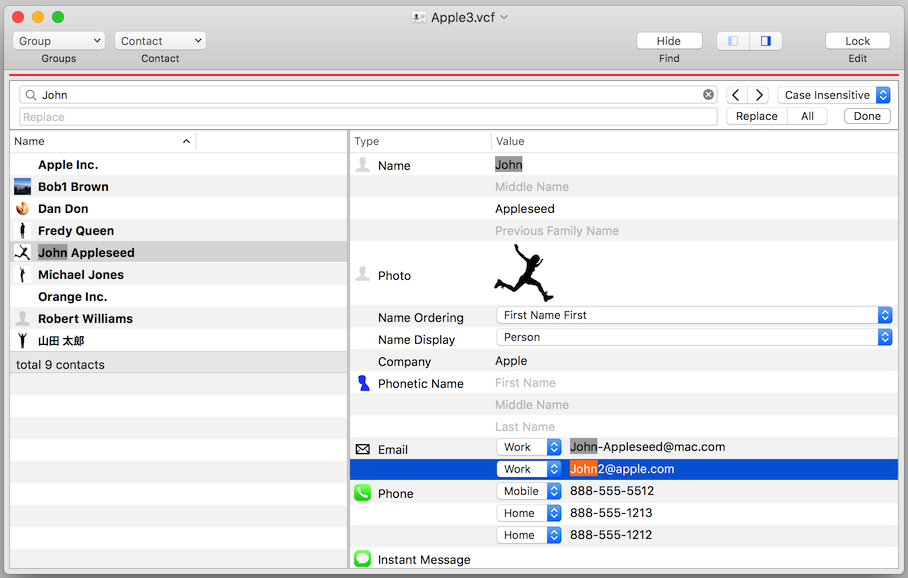
The matched strings are shown in gray background. And the orange background shows that the string is replaced when you click the Replace button.
When you click the All button, the strings that has the gray background in the table are all replaced.
Replacing string in the Address cell
You can replace the Cupertino with other string directly. The way of matching string is done in each item of the address. Howerver you can not find the "Cupertino, CA", because the string consists of the two items.
Please note that the search string is done by the each sub item. For example the Address stirng consists of 5 sub items: ZIP, State, City, Street and County.
You can find "Cupertino" or "CA" separately, but cann't find "Cupertino, CA".
The string in the Birthday and Dates cells can be searched by the FindBar.
However the string can not be replaced via the Replace Button.
Use the Find Panel
The Find Panel is shown when you select the "Show Find Panel" menu in the edit menu or type Cmd+Shift+F as a short cut.
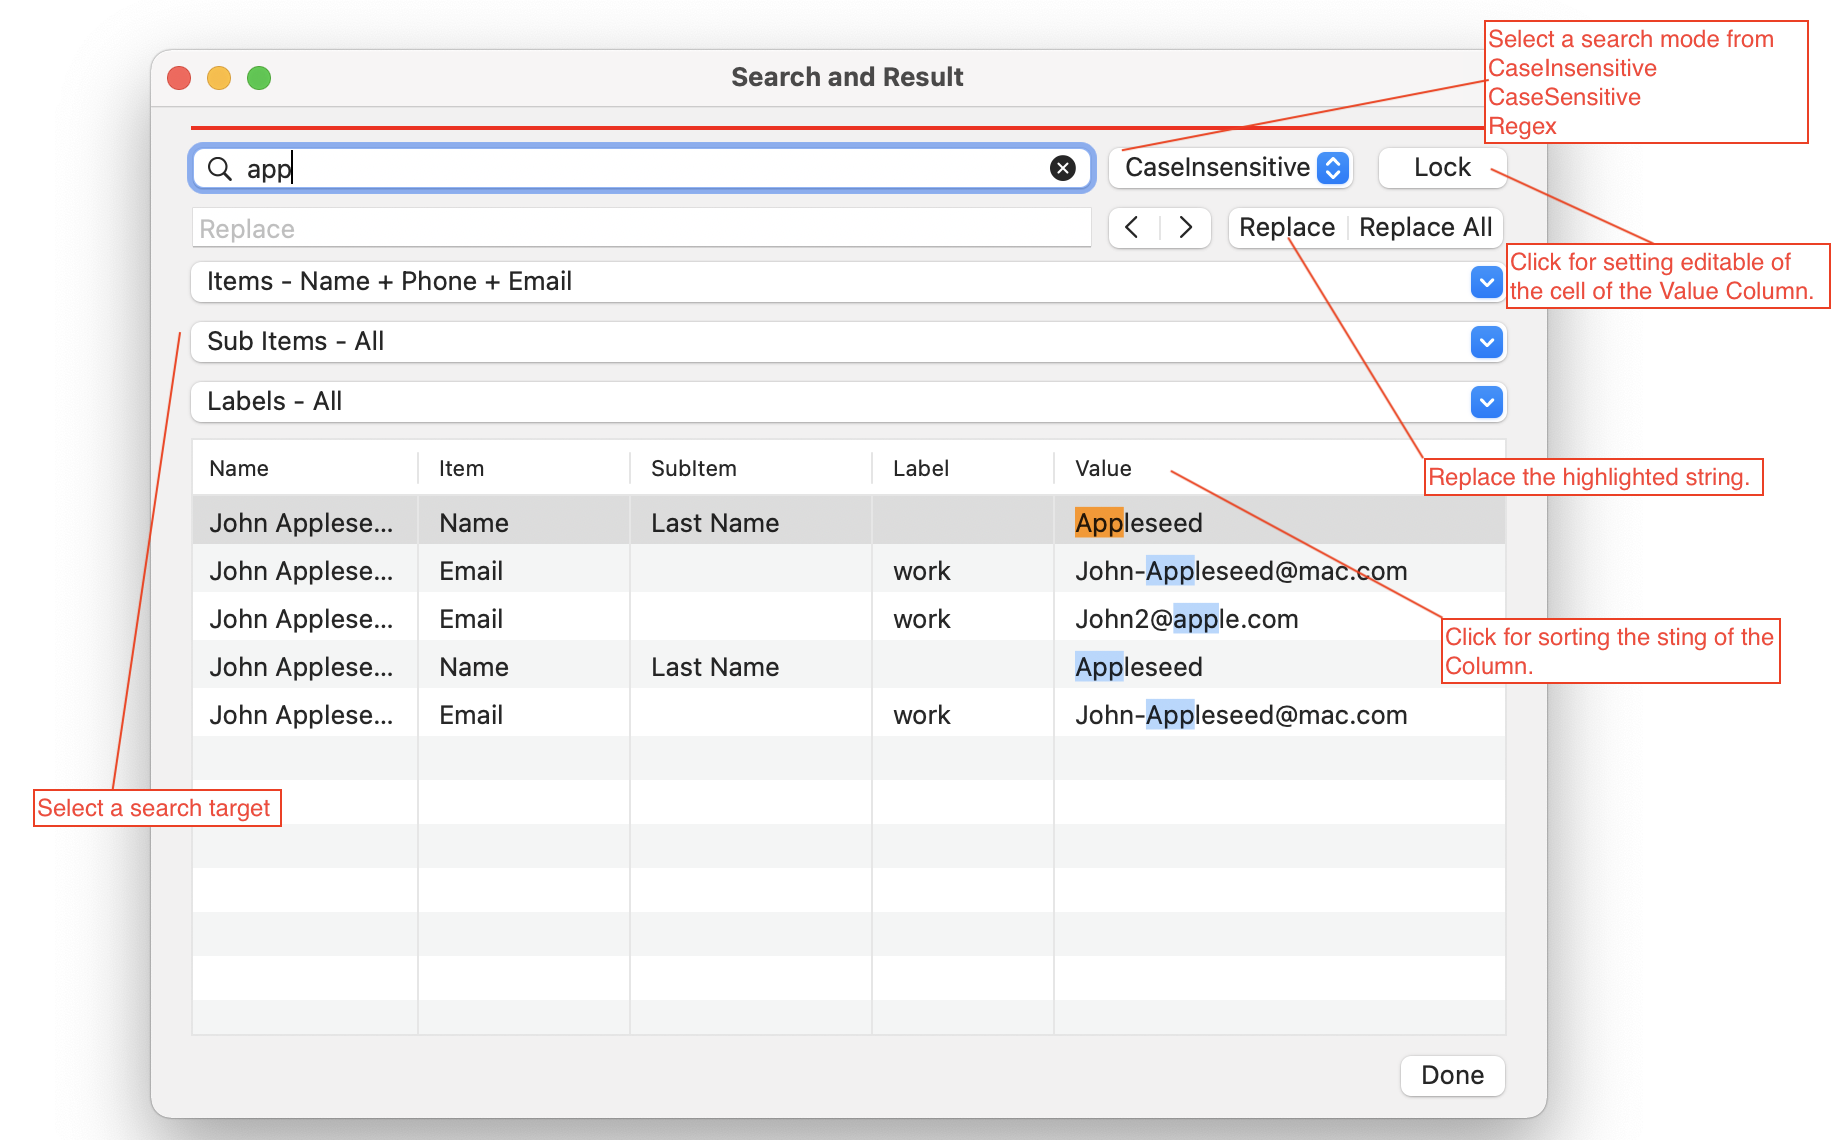
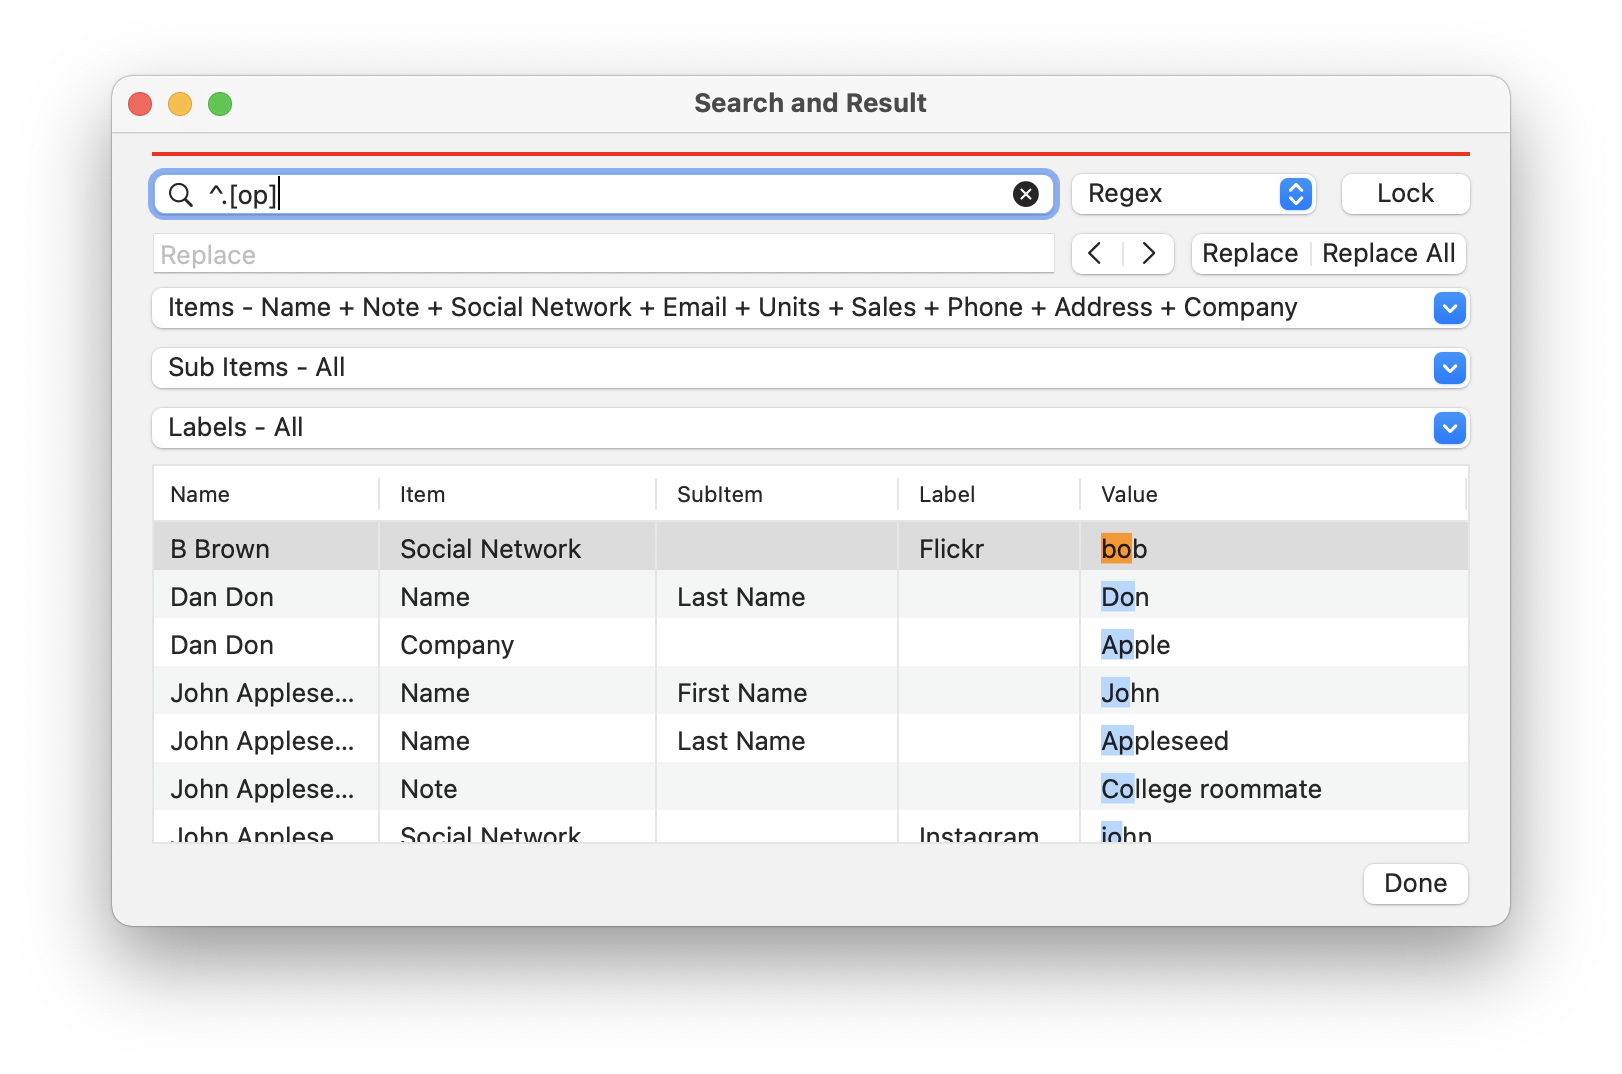
In this panel, the search is performed by narrowing down the items selected by the data type and label. Matching items are listed in the table with their names.
Click the Replace button to replace the orange highlighted text with the string in the Replace field.
Click the "Replace All" button to replace the orange and blue highlighted text.
These operations can be undone by clicking "Undo" in the edit menu.
Also click the "Edit / Lock" button at the top right of the panel to enter edit mode (the button name will be Lock), then double-click a cell in the "Value" column to directly rewrite the value in that cell. This operation can be undoable too.
You can sort the table by each item by clicking the header of the table column.
Search by Regex expression
When you select the "Regex" in the search mode menu, the regex expression is used to find a word. Please refer to the detail of the regex expression at "WiKi Regex expression".
The following example is that the expression, "^.[op]" is used to look for the word which starts with any charcter and the second is "o" or "p".
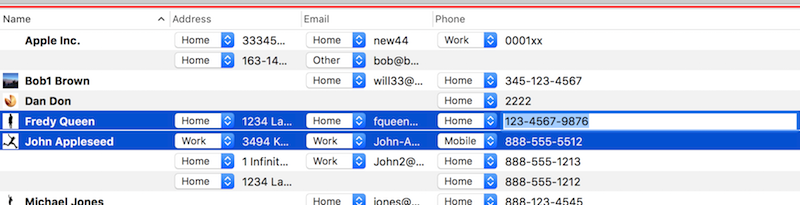
Setting the same label or value in the selected rows
The new feature is setting the same label or value in the seleced rows at once.
It works on the phone, email and note column and so on.
Please try to change a label in a column such as Phone with selecting multiple rows, an alert will be shown for making sure the operation.
When you click the OK button, all the labels of the Phone column you selected will be changed.
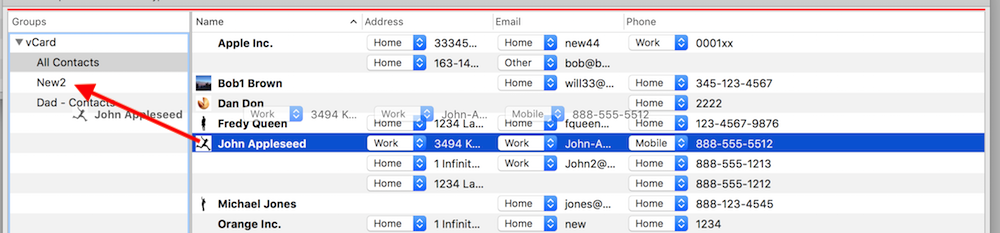
Adding/Deleting members in a group
You can add/delete members of a group in the Group view which is opened by the "Show Groups" menu in the Group Button.
To add members in a certain group, select contacts in the "All Contacts", then drag and drop them to the group.
To delete members in a certain group, select contacts in the group, then select the "Delete Contacts" menu in the contact button.
The contacts are deleted in the group but not deleted in the "All Contacts".
Editing contact image
You can set the image of contact in the contact info panel.
Show the contact info and "drag and drop" the image on to the contact image.
In order to delete the image, control-click on the image, then the context menu show the menu to delete the image.

Reading CSV file
vCard Lite expects the items in a CSV file are ordered as the following keywords. If the file has a line at the beginning to designate the items order, the items are read as the specified order.
Please check the sample file if you want to add the items line.
Name,Home Phone,Work Phone,Other Phone,Home Email,Work Email,Other Email,Home ZIP,Home State,Home City,Home Street,Work ZIP,Work State,Work City,Work Street,Other ZIP,Other State,Other City,Other Street,Birthday,Title,Company,Department,Job Title,First Name,Last Name,Nickname,Note,Facebook,LinkedIn,Flickr,SinaWeibodownload the sample csv Sample CSV File
Exporting as CSV
The Export as CSV menu in the file menu is for exporting contacts as CSV.
The menu is enabled when more than one contact are selected in the windows.
And the exported file has a first line as explained above, and the text encoding will be UTF-8.

The CSV file has the first line which is mentioned above in order to designate the order of value. It means that not all the values in the contact are written in the file.
Reordering table rows in the contact info view
The rows in the contact info view can be reordered by the Drag and Drop.
Click the cell in the type column and drag the cell with holding the button to the row you want to move. When you release the button, the source row will move to the destination row.